
Intermatic Timer Switch Instructions: A Comprehensive Guide
Intermatic provides robust solutions for lighting, energy controls, and surge protection, offering a wide range of applications from basic timers to Wi-Fi enabled devices.
This guide details installation, programming, troubleshooting, and resources for Intermatic timer switches, ensuring efficient and reliable operation for various electrical loads.
Understanding Intermatic Timer Switches
Intermatic timer switches are essential for automating electrical loads, offering convenience and energy savings across residential, commercial, and industrial settings. These devices control power to various applications, including lights, pumps, heaters, and fans, based on pre-set schedules.
They range from simple mechanical models, known for their reliability and low maintenance, to sophisticated digital and smart switches offering advanced programming capabilities. Understanding the core function – precisely controlling on/off cycles – is key. Intermatic’s product line caters to diverse needs, from basic in-wall timers to comprehensive energy management systems.
Choosing the right switch depends on the application’s complexity and desired features. Features like override functions, random settings, and daylight saving time adjustments enhance usability and efficiency. Proper selection ensures optimal performance and longevity of the timer switch and connected equipment.
Types of Intermatic Timer Switches
Intermatic offers a diverse range of timer switches to suit various needs. Mechanical timer switches are the most basic, utilizing a spring-wound mechanism for simple, reliable operation – ideal for consistent schedules and low maintenance. They are commonly used for water pumps, lights, and fans.
Digital timer switches provide enhanced precision and flexibility with programmable on/off times, multiple schedules, and override functions. These are suitable for more complex lighting control and energy management.
Finally, Smart timer switches integrate Wi-Fi connectivity, enabling remote control and monitoring via smartphone apps. They often include advanced features like energy usage tracking and integration with smart home systems. Intermatic’s catalog includes in-wall timers, weatherproof options, and specialized controls for pool and spa equipment.
Mechanical Timer Switches
Intermatic’s mechanical timer switches are renowned for their simplicity and durability, offering a cost-effective solution for basic scheduling needs. These switches operate using a spring-wound mechanism, allowing users to set on/off times by physically positioning the control dial.
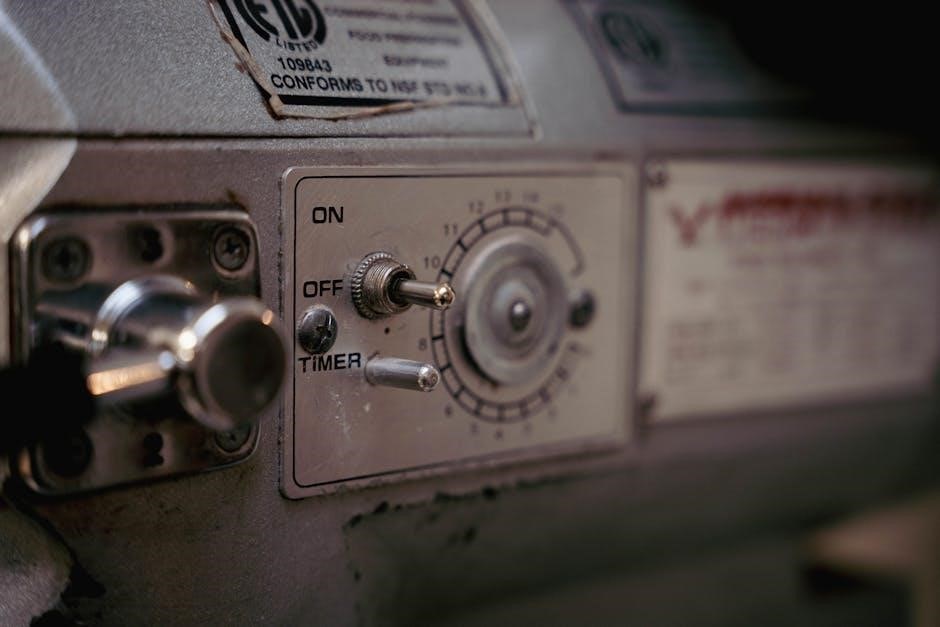
They require no electrical power for timekeeping, making them exceptionally reliable. These are ideal for applications where consistent, predictable schedules are required, such as controlling outdoor lighting, water pumps, or fans.
Being low maintenance, they are a popular choice for long-term installations. While lacking the advanced features of digital or smart models, their straightforward operation and robust construction ensure years of dependable service. Intermatic provides various mechanical timer models with different amperage ratings and enclosure types.
Digital Timer Switches
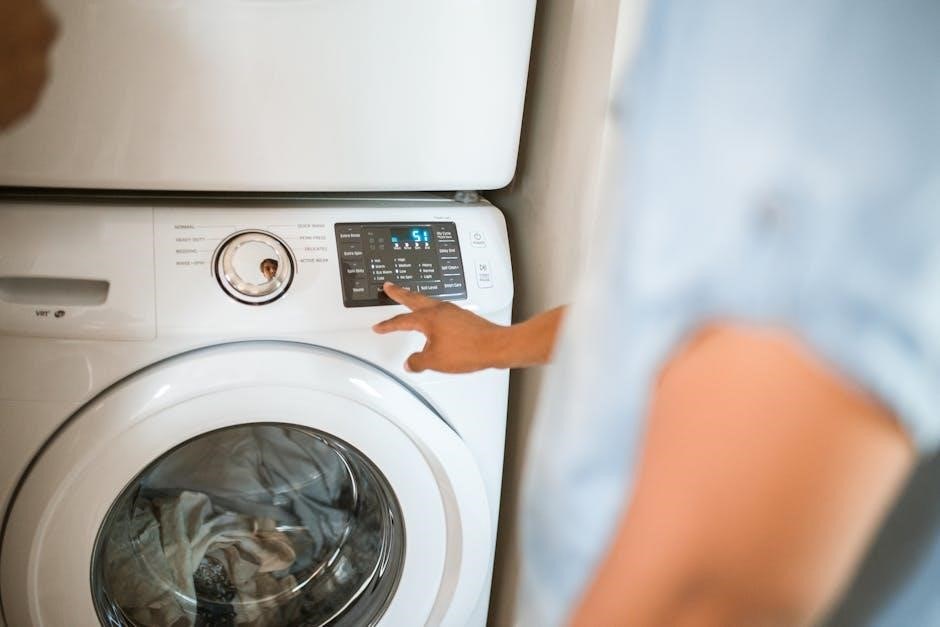
Intermatic’s digital timer switches offer enhanced precision and flexibility compared to mechanical models. These switches utilize electronic components to provide accurate timekeeping and programming capabilities. They feature a digital display for easy setting of the current time, date, and on/off schedules.
Digital timers allow for multiple on/off events per day, offering greater control over electrical loads. Many models include features like override functions and battery backup to maintain settings during power outages.
They are suitable for a wide range of applications, including indoor and outdoor lighting, appliances, and HVAC systems. Intermatic’s digital timers often require a small amount of power to operate, even when not actively switching a load. Accessing the full functionality often requires reviewing the specific model’s instruction manual.
Smart Timer Switches
Intermatic’s smart timer switches represent the cutting edge of their product line, integrating Wi-Fi connectivity for remote control and monitoring. These devices allow users to manage schedules and settings via smartphone apps, offering unparalleled convenience and flexibility.
Smart timers often feature advanced functionalities like voice control compatibility (e.g., Amazon Alexa, Google Assistant) and integration with smart home ecosystems. They provide real-time energy usage data and customizable notifications.
Installation typically involves connecting the switch to the home’s Wi-Fi network. Intermatic continues to evolve, pushing the industry forward with these Wi-Fi enabled solutions. Detailed setup instructions and troubleshooting guidance are usually available through the accompanying mobile app and online resources.

Installation Procedures
Proper installation is crucial for safe and reliable operation of Intermatic timer switches; always prioritize safety precautions and adhere to wiring diagrams.
Carefully follow the steps for your specific model, ensuring secure connections to the power source and controlled load.
Safety Precautions Before Installation
Prior to commencing any installation, absolutely disconnect power to the circuit at the breaker box or fuse panel. Verify the power is off using a non-contact voltage tester to prevent electrical shock.
Always read and understand the Intermatic timer switch’s instruction manual thoroughly before beginning. Ensure the timer switch is compatible with your wiring and electrical system. If you are uncomfortable working with electrical wiring, consult a qualified electrician.
Use appropriate tools, including insulated screwdrivers and wire strippers. Never work with wet hands or in damp environments. Inspect all wiring for damage before connecting it to the timer switch. Ensure all connections are tight and secure to prevent loose wires and potential hazards. Follow all local electrical codes and regulations.
Wear safety glasses to protect your eyes from debris.
Wiring Diagrams – General Overview

Intermatic timer switches generally utilize a standard wiring configuration, though specifics vary by model (mechanical, digital, or smart). Typically, you’ll encounter connections for Line (Hot), Neutral, and Load wires. Some models may include a Ground wire for added safety.
Line (Hot) wire brings power to the timer, while the Load wire carries power from the timer to the device being controlled (lights, pumps, etc.). The Neutral wire completes the circuit.
Wiring diagrams are crucial; they are usually found on the timer switch itself or within the accompanying instruction manual. Always refer to the diagram specific to your model. Incorrect wiring can damage the timer, the connected device, or create a safety hazard.
Color coding (black for hot, white for neutral, green/bare for ground) is common, but always verify with a voltage tester before making connections.
Wiring a Basic Mechanical Timer
Before starting, ensure power is OFF at the circuit breaker. A basic mechanical Intermatic timer typically has three terminals: L (Line/Hot), T (Load), and N (Neutral). Connect the incoming Line (Hot) wire to the ‘L’ terminal. Attach the wire leading to the device you’re controlling (the Load) to the ‘T’ terminal.
The Neutral wire bypasses the timer and connects directly to the neutral wire of the device being controlled, often using a wire nut. A Ground wire, if present, should be connected to the grounding screw on the timer and the device’s grounding point.
Double-check all connections for tightness and proper insulation. Mechanical timers are known for their reliability and low maintenance, making them ideal for simple on/off scheduling. Always consult the specific wiring diagram included with your timer model.
Wiring a Digital Timer Switch
Safety first: disconnect power at the breaker before wiring. Digital Intermatic timers generally have terminals labeled Line (L), Load (T), Neutral (N), and Ground. Connect the incoming hot wire to ‘L’, and the wire going to your device to ‘T’. The neutral wire bypasses the timer, connecting directly to the device’s neutral wire.
Securely attach the ground wire to the grounding screw on both the timer and the controlled device. Some digital models may have additional terminals for features like astronomic timekeeping. Carefully follow the wiring diagram specific to your model, as terminal labeling can vary.
Ensure all connections are tight and properly insulated. Digital timers offer precise scheduling and often include features like override and random settings.
Connecting to Power Source
Before restoring power, double-check all wiring connections against the diagram for your specific Intermatic timer model. Ensure wires are securely fastened to their respective terminals and that no bare wire is exposed. A loose connection can cause malfunction or create a safety hazard.
Once verified, carefully restore power at the circuit breaker. Observe the timer’s display; it should illuminate, indicating it’s receiving power. If it doesn’t, immediately turn off the breaker and re-examine the wiring.
Some digital models require initial setup, including setting the current time and date, before they will operate correctly. Refer to the programming section of this guide for detailed instructions. Always prioritize safety when working with electrical systems.

Programming and Settings
Intermatic timers offer versatile scheduling options, from simple on/off times to random settings for enhanced security and energy efficiency, easily customized for your needs.
Explore override functions and daylight saving adjustments for optimal control and convenience, maximizing the benefits of your timer switch.
Setting the Current Time and Date (Digital Models)
For digital Intermatic timer switches, accurately setting the current time and date is crucial for proper schedule operation. Begin by locating the “Set” or “Program” button – its position varies by model, so consult your specific manual. Pressing this button typically enters the programming mode.
Use the “Hour” and “Minute” buttons to adjust the current time. Some models may require cycling through AM/PM settings. Similarly, navigate to the date setting using the “Set” button and adjust the month, day, and year. Confirm each selection by pressing “Set” or “Enter”.
Pay close attention to the display; ensure the correct format (12 or 24-hour) is selected. After setting both time and date, exit the programming mode – usually by pressing “Set” one final time or allowing the timer to time out. A correctly set time ensures your programmed schedules activate precisely when intended, maximizing energy savings and convenience.
Programming On/Off Schedules
To program on/off schedules on your digital Intermatic timer, enter programming mode using the “Set” or “Program” button. Most models allow for multiple on/off cycles daily or weekly. Begin by selecting the day(s) you want the schedule to apply to – options include individual days, weekdays, weekends, or all days.
Next, set the first “On” time using the “Hour” and “Minute” buttons. Confirm the setting, then program the corresponding “Off” time. Repeat this process for each desired on/off cycle. Remember to save each cycle before proceeding.
Some models offer preset programs for common applications. Review your manual for available options. Carefully verify your programmed schedule to ensure it aligns with your needs. Accurate scheduling maximizes energy efficiency and automates your desired lighting or appliance control.
Using the Override Function
The override function on your Intermatic timer allows for temporary operation outside of the programmed schedule. This is useful for situations requiring immediate control, such as manually turning on lights during unexpected darkness or operating equipment beyond scheduled times.
Typically, activating the override involves pressing a dedicated “Override” or “Manual” button. This will force the timer to either turn the connected load “On” or “Off”, depending on its current state. The override duration varies by model; some timers maintain the override until manually canceled, while others revert to the programmed schedule after a set period.
Always consult your specific model’s manual to understand the override behavior. Be mindful that frequent override use defeats the purpose of automated scheduling. Use it sparingly for exceptional circumstances to maintain energy efficiency and programmed control.
Understanding the Random Setting
The random setting on select Intermatic digital and smart timer switches enhances security by simulating occupancy when you’re away. Instead of following a predictable on/off schedule, the timer activates lights or other devices at varying, seemingly random times.
This feature is particularly beneficial for home security, deterring potential intruders by creating the illusion someone is home. The randomness isn’t truly random; it operates within a programmed range, ensuring the device doesn’t switch unexpectedly during critical periods.
To activate the random setting, navigate through the timer’s programming menu. The user manual will detail the specific steps for your model. Remember to consider the type of load connected – random operation might not be suitable for all applications. It’s a valuable tool for security, but understand its limitations.
Adjusting for Daylight Saving Time
Daylight Saving Time (DST) adjustments require manual intervention on many Intermatic timer switches, particularly mechanical models. Digital and smart models often offer an automatic DST setting, simplifying the process.
For mechanical timers, you’ll need to manually advance the timer dial forward one hour in the spring and backward one hour in the fall. Consult your specific model’s instructions for precise guidance. Digital timers with an auto-DST function typically require enabling this feature within the settings menu.

Incorrect DST settings can disrupt programmed schedules, so verifying the time after the change is crucial. Regularly check the timer’s accuracy, especially around the DST transition dates. Proper adjustment ensures your lighting and appliance controls remain synchronized with the current time.

Troubleshooting Common Issues
Common problems with Intermatic timers include failure to turn on/off, incorrect time displays, programming difficulties, tripped breakers, and battery issues.
This section provides solutions to diagnose and resolve these issues, ensuring optimal performance and reliable operation of your timer switch.
Timer Not Turning On/Off
If your Intermatic timer isn’t operating as expected, several factors could be at play. First, verify the power supply to the timer is active and the circuit breaker hasn’t tripped. A tripped breaker is a frequent cause, easily remedied by resetting it.
Next, double-check the programmed schedule. Ensure the on/off times are correctly set for the current day and that the override function isn’t activated, preventing scheduled operation. Inspect the timer’s settings for any accidental changes.
For mechanical timers, confirm the selector pins or dial are accurately positioned for the desired on/off times. Digital models should be checked for correct time and date settings. If the issue persists, consult the timer’s manual for specific troubleshooting steps related to your model. A faulty timer may require replacement.
Finally, ensure the connected load (light, pump, etc.) is functioning correctly independently of the timer.
Incorrect Time Display
An inaccurate time display on your Intermatic digital timer can disrupt programmed schedules. Begin by verifying the battery level, as low batteries often cause time inaccuracies or resets. Replace the battery with a fresh one, ensuring correct polarity.
Next, carefully reset the current time and date following the instructions in your timer’s manual. Pay close attention to AM/PM settings. Some models may require a reset procedure after battery replacement to synchronize the internal clock.
If the time continues to drift, check for potential interference from strong electromagnetic sources nearby. While uncommon, these can sometimes affect digital timing circuits. Ensure the timer is securely mounted and not subject to physical vibrations.
For persistent issues, consult the troubleshooting section of the manual or contact Intermatic customer support for assistance. A faulty internal clock may necessitate timer replacement.
Difficulty Programming
Encountering programming challenges with your Intermatic timer? First, ensure you’re referencing the correct manual for your specific model, as procedures vary significantly. Carefully review the programming steps, paying attention to button functions and display indicators.
Try resetting the timer to factory defaults (consult your manual for the procedure) and then re-programming from scratch. This can clear any accidental or corrupted settings. Slow down and execute each step deliberately, avoiding rushed button presses.
If using a digital model, confirm the display is functioning correctly and that all buttons are responsive. For smart timers, verify a stable Wi-Fi connection and that the app is up-to-date.
Intermatic’s customer support offers excellent assistance. Download the PDF manual from their website or contact them directly for personalized guidance if you remain stuck.
Tripped Circuit Breaker
A tripped circuit breaker indicates an overload or short circuit. Immediately turn off the timer and the connected load. Do not repeatedly reset the breaker without identifying the cause, as this poses a fire hazard.
First, disconnect the timer completely from the power source and the load. Check the wiring for loose connections, damaged wires, or improper connections. Ensure the load’s wattage does not exceed the timer’s and the circuit’s capacity.
If the breaker trips again after reconnection, the issue likely lies within the load itself or the wiring. Consult a qualified electrician to diagnose and repair the problem. Intermatic timers are designed for reliable load control, but electrical safety is paramount.
Verify the timer is compatible with the type of load being controlled (e.g., inductive loads may require specific timer types).
Battery Replacement (Digital/Smart Models)
Digital and smart Intermatic timer switches utilize batteries to maintain programming during power outages. A low battery is often indicated by a flashing display or an error message. Replace the battery promptly to prevent loss of settings;
Refer to your specific model’s manual for the correct battery type and replacement procedure. Typically, access is gained by opening a battery compartment on the timer’s face or back. Always use a new, high-quality battery of the specified type.
Carefully remove the old battery and insert the new one, observing the correct polarity (+ and -). Ensure the battery is securely seated before closing the compartment. The timer should automatically resume normal operation.
Resources and Support
Intermatic offers extensive support, including downloadable manuals in PDF format, a dedicated customer support team, and warranty registration options for product assistance.
Adobe Acrobat Reader is required to view and interact with PDF documents, ensuring easy access to vital information and troubleshooting guides.
Downloading Manuals (PDF Format)
Intermatic provides a comprehensive library of product manuals readily available for download in PDF format directly from their official website. These manuals are essential resources for understanding your specific timer switch model, covering everything from initial setup and wiring diagrams to detailed programming instructions and troubleshooting tips.
Accessing these PDF documents ensures you have the most up-to-date information at your fingertips, eliminating the need to wait for physical copies. You’ll find manuals categorized by product type – mechanical, digital, and smart timers – making it easy to locate the correct documentation.
Remember that Adobe Acrobat Reader software is necessary to open, view, print, and annotate these PDF files. This free software is the industry standard and ensures compatibility across various devices. Downloading the manual allows for offline access, perfect for on-site installations or troubleshooting without an internet connection.
Intermatic Customer Support Contact Information
Intermatic prides itself on award-winning customer support, readily available to assist with any questions or challenges you may encounter regarding your timer switch. Their dedicated sales and support teams are eager to provide guidance, ensuring a smooth experience with their products.
For direct assistance, you can reach Intermatic through their website’s contact form, allowing you to submit detailed inquiries. While a direct phone number isn’t prominently displayed, utilizing the contact form ensures your request reaches the appropriate specialist.
Furthermore, Intermatic actively encourages customer feedback via websitefeedbackintermatic.com, allowing you to share suggestions for improving their website and product information. This commitment to customer satisfaction demonstrates their dedication to providing a positive user experience and resolving any issues efficiently.
Warranty Information and Registration
Intermatic stands behind the quality and reliability of its timer switches, offering comprehensive warranty coverage to protect your investment. Details of the warranty period vary depending on the specific product model, ensuring appropriate protection for each device.
To explore the warranty coverage for your particular Intermatic timer switch, it is highly recommended to visit their official website. There, you can find detailed warranty documentation outlining the terms and conditions, as well as the duration of coverage.
Furthermore, Intermatic encourages customers to register their products online. Registration not only streamlines the warranty claim process if needed, but also provides access to exclusive updates, product information, and enhanced support. Registering your timer switch demonstrates your ownership and ensures you receive the full benefits of your Intermatic purchase.
Adobe Acrobat Reader Requirements
Many Intermatic timer switch resources, including instruction manuals and detailed documentation, are provided in PDF (Portable Document Format). To effectively view, print, sign, share, and annotate these essential documents, you will need a PDF reader installed on your computer or mobile device.
Adobe Acrobat Reader is the free, globally trusted standard for interacting with PDF files. It’s the only PDF viewer guaranteed to open and correctly display all types of PDF content, ensuring you can fully access the information provided by Intermatic.
You can easily download and install the latest version of Adobe Acrobat Reader directly from the Adobe website. While other PDF readers may be available, Adobe Acrobat Reader ensures optimal compatibility and functionality with Intermatic’s documentation, facilitating a smooth and informative experience.
Frequently Asked Questions (FAQ)
Q: Where can I find detailed instructions for my specific Intermatic timer switch model? A: Visit the Intermatic website and utilize the manual download section. You can search by model number to locate the correct PDF documentation.

Q: What if my timer isn’t turning on or off as programmed? A: First, verify the power source and wiring connections. Then, double-check the programmed schedule and ensure the override function isn’t active. Consult the troubleshooting section of your manual.

Q: Is Intermatic customer support available if I need further assistance? A: Yes! Intermatic offers an award-winning customer support team ready to answer your questions. Contact information is available on their website.
Q: How do I register my Intermatic product for warranty coverage? A: Product registration is available online through the Intermatic website, providing added support and ensuring your investment is protected.