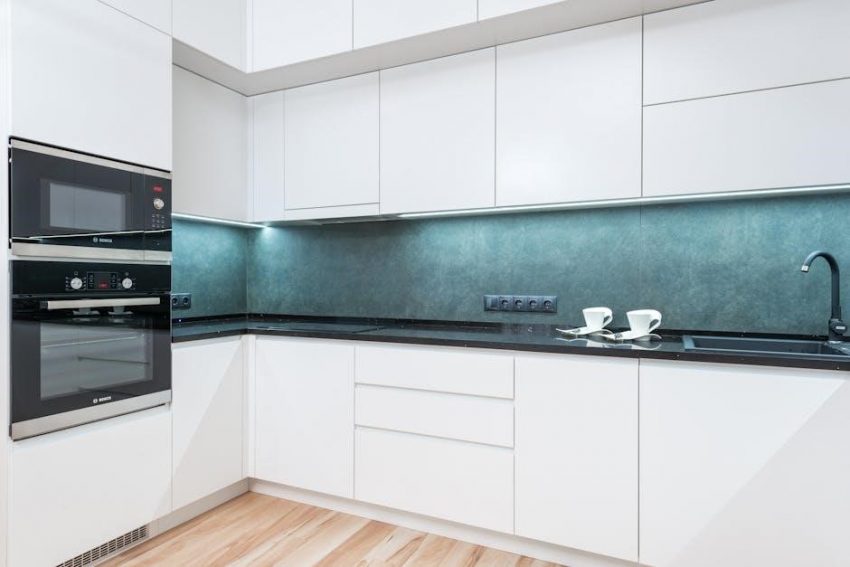
Viking self-cleaning ovens feature a pyrolytic cleaning cycle that uses high heat to reduce food residue to ash, ensuring a safe and efficient cleaning process.
Overview of Viking Self-Cleaning Technology
Viking self-cleaning ovens utilize a pyrolytic cleaning system, which employs extremely high temperatures to break down food residue into ash. This advanced technology ensures a safe and efficient cleaning process by burning away tough grease and spills. The oven’s interior is designed to withstand these elevated temperatures, while a smoke eliminator helps minimize odors during the cycle. Once the process is complete, the cooled ash can be easily wiped away, leaving the oven interior clean. This feature eliminates the need for harsh chemicals, providing a convenient and eco-friendly cleaning solution for maintaining your Viking oven’s performance and appearance.
Benefits of Using the Self-Cleaning Feature
The self-cleaning feature of Viking ovens offers numerous advantages, including effortless removal of tough food residue and grime without the need for scrubbing or harsh chemicals. This technology not only saves time but also ensures a deeper clean, improving the oven’s efficiency and performance. By eliminating the need for abrasive cleaners, it helps maintain the oven’s interior finish and prevents potential damage. Additionally, the high-heat cycle reduces food particles to ash, which can be easily wiped away, leaving the oven looking like new. This feature also promotes a safer cleaning experience, as it avoids exposure to strong fumes from chemical-based cleaners. Regular use of the self-cleaning function extends the lifespan of the oven, ensuring optimal cooking results for years to come while maintaining a hygienic cooking environment. Furthermore, it reduces the risk of lingering odors and bacteria growth, contributing to a cleaner and more pleasant kitchen space overall.
Preparation for the Self-Cleaning Cycle
Before initiating the self-cleaning cycle, remove racks, utensils, and large food debris to ensure efficient cleaning and prevent damage from high heat.
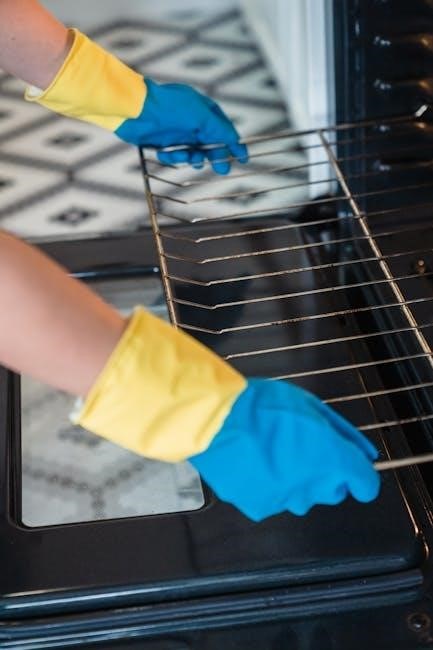
Removing Oven Racks and Utensils
Remove all oven racks, rack supports, broiler pans, and utensils before starting the self-cleaning cycle. High temperatures can damage or discolor these items. Do not leave foil or other materials inside, as they may melt or cause damage. Ensure the oven is empty except for the interior surfaces you wish to clean. This step is crucial for both safety and effectiveness, preventing any obstructions and allowing the cycle to function properly.
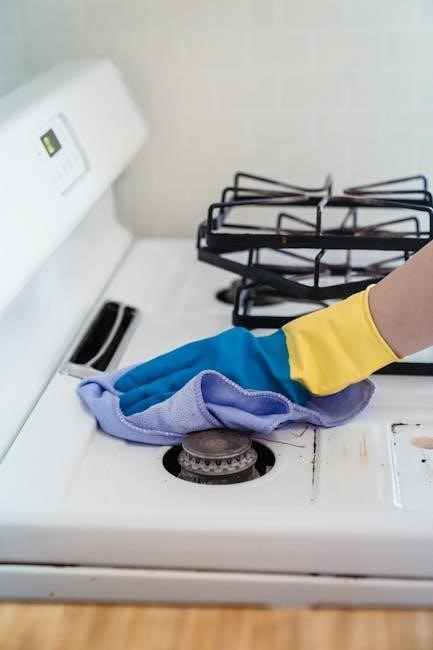
Cleaning Large Spills Before the Cycle
Before initiating the self-cleaning cycle, clean large food spills from the oven bottom and sides using detergent and hot water. Avoid using abrasive cleaners or harsh chemicals, as they can damage the interior. Rinse thoroughly and dry the surfaces. Excessive spills can cause smoke or flare-ups during the high-heat cleaning process. Wipe the oven door and frame, up to 2 inches inside, to ensure proper sealing and prevent residue buildup. This step ensures the self-cleaning cycle operates efficiently and reduces unpleasant odors.
Ensuring the Oven Door is Properly Closed
Properly closing the oven door is essential for the self-cleaning cycle to function safely and efficiently. Ensure the door aligns correctly and the gasket is in good condition to create a tight seal. Close the door gently until it latches securely; do not force it, as this could damage the locking mechanism. The door must remain fully closed and latched throughout the cycle. If the door is not properly closed, the self-cleaning cycle will not start. A secure seal ensures high heat is retained, promoting effective cleaning and minimizing heat loss.

Starting the Self-Cleaning Cycle
Select the Self-Clean mode via the control panel, choose the desired duration, and press Start. The oven will lock the door and initiate the high-heat cleaning process.
Selecting the Self-Clean Mode
To initiate the self-cleaning process, locate the Self-Clean button on your Viking oven’s control panel and press it. This will activate the pyrolytic cleaning function, which is designed to burn off food residue at high temperatures. The oven will automatically lock the door once the cycle starts to ensure safety. Depending on your model, you may have options to choose different cleaning durations or modes. Always refer to your owner’s manual for specific instructions on selecting the right mode for your cleaning needs. This feature ensures a thorough and efficient cleaning without the use of harsh chemicals.
Setting the Cycle Duration
Selecting the appropriate cycle duration is essential for effective cleaning. Viking ovens offer preset options based on the level of soil inside. Light cleaning may take 1-2 hours, while heavier residue requires up to 4 hours. Use the control panel to choose the desired duration, ensuring it aligns with the oven’s condition. The oven will automatically calculate the necessary time and temperature. Once set, the door will lock, and the cycle will begin. Note that the duration includes cooling time, so plan accordingly. Always refer to your manual for specific time recommendations to achieve optimal results. Proper timing ensures a thorough clean.
Understanding the Door Lock Mechanism
The door lock mechanism is a critical safety feature during the self-cleaning cycle. Once the cycle starts, the door locks automatically to prevent opening during high heat. This ensures safety by preventing burns and maintaining optimal cleaning conditions. The lock remains engaged until the oven cools down to a safe temperature, typically taking about 30 minutes after the cycle ends. Avoid forcing the door open, as this can damage the lock or the oven. The indicator light will signal when the door is unlocked and safe to open. This mechanism is essential for both safety and effective cleaning. Always wait for the cycle to complete and the oven to cool before accessing the interior.
During the Self-Cleaning Cycle
The oven operates at extremely high temperatures, converting food residue into ash. High heat ensures thorough cleaning, while the door remains locked for safety and efficiency.
High Heat Operation and Safety
During the self-cleaning cycle, the oven reaches extreme temperatures to burn food residue into ash. The door locks automatically to ensure safety, preventing accidental opening. Always avoid using the oven for cleaning other parts, as high heat can damage components. Keep children away and never disable safety features. Proper ventilation is essential to manage smoke and odors. Allow the oven to cool fully before wiping away ash, ensuring a safe and efficient cleaning process.
Managing Smoke and Odors
The self-cleaning cycle generates smoke and odors due to high heat burning food residue. To minimize this, ensure good ventilation by opening windows or using an exhaust fan. Avoid using foil or abrasive cleaners, as they can create toxic fumes. The oven’s smoke eliminator helps reduce odors, but excessive smoke may require temporary pauses in the cycle. Stay nearby during cleaning to address any unexpected smoke. Proper preparation, like removing large spills beforehand, also helps reduce odor intensity. Always keep the oven door closed during the cycle to contain smoke and ensure safety.
Monitoring the Cleaning Process
Monitor the self-cleaning cycle through the oven window to ensure even burning of residue. Avoid opening the door during the cycle, as high temperatures can cause burns. The cycle typically lasts 2-4 hours, depending on soil level. After completion, let the oven cool before wiping ash. Use gloves and a damp cloth to remove residue. Proper monitoring ensures efficiency and safety. Follow manual guidelines to avoid damage or hazards, ensuring optimal results from the self-cleaning feature.
Post-Cleaning Steps
After the self-cleaning cycle, allow the oven to cool completely. Wipe away ash with a damp cloth and clean the door gasket for optimal performance. Always ensure all residue is removed to maintain efficiency and safety for future use. Proper post-cleaning care extends the oven’s lifespan and ensures reliable operation. Follow these steps diligently to keep your Viking oven in excellent condition. Regular maintenance is key to preserving its functionality and appearance. By adhering to these guidelines, you can enjoy a clean, efficient, and long-lasting cooking experience with your Viking oven.
Allowing the Oven to Cool Down
After the self-cleaning cycle, it is crucial to let the oven cool down completely. The high heat from the cycle can cause burns if the oven is opened too soon. The cooling process typically takes about 30 minutes to an hour after the cycle ends. During this time, the oven door will remain locked to ensure safety and prevent accidental burns. Once the oven has cooled, you can safely open the door and proceed with wiping away ash and residue. Allowing the oven to cool ensures that any remaining residue is manageable and prevents damage to the oven’s interior or door seal. This step is essential for maintaining the oven’s performance and longevity.
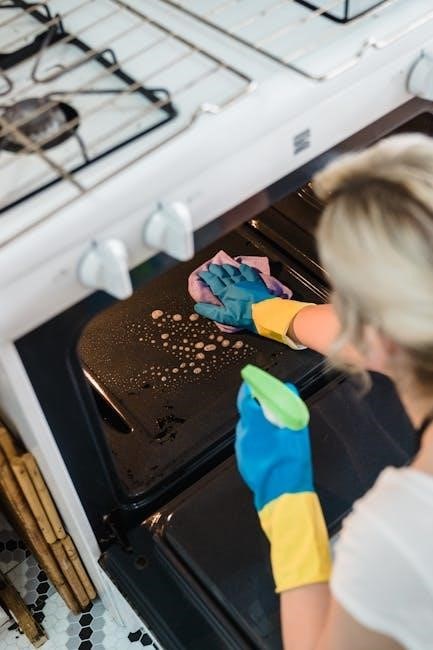
Wiping Away Ash and Residue
Once the oven has cooled, use a damp cloth or paper towels to wipe away the ash and residue. For stubborn spots, a soft, non-abrasive sponge or cloth can be used. Avoid using harsh chemicals or abrasive cleaners, as they may damage the oven’s finish. Lightly dampen the cloth with water, but ensure it’s not soaking wet to prevent moisture spots. Wipe the interior surfaces thoroughly, including the back, sides, and bottom. Avoid touching the oven gasket or door seals, as residue or moisture could compromise their integrity. Dispose of the ash and residue carefully, as they may be powdery and messy. This step ensures a clean and ready-to-use oven.
Cleaning the Oven Door and Gasket
After the self-cleaning cycle, clean the oven door and gasket to maintain their condition. Use a mild detergent and hot water to wipe down the door, paying attention to the edges and any visible residue. Rinse thoroughly with a clean, damp cloth and dry to prevent water spots. For the gasket, inspect for food particles or ash and gently clean with a soft brush or damp cloth. Avoid harsh chemicals or abrasive cleaners, as they may damage the rubber. Regular cleaning ensures the gasket remains intact, providing a proper seal for efficient cooking and cleaning cycles.
Maintenance and Care
Regularly wipe spills and clean racks to maintain efficiency. Avoid harsh chemicals and abrasives, as they can damage surfaces. This ensures optimal performance and longevity.
Regular Cleaning to Maintain Efficiency
Regular cleaning is essential for maintaining your Viking oven’s efficiency. Remove racks, pans, and utensils before each self-cleaning cycle to prevent damage from high heat. Wipe up large spills beforehand to avoid smoke and flare-ups. Avoid using harsh chemicals or abrasive cleaners, as they can damage the oven’s interior or door gasket. Instead, use mild detergents and hot water to clean exterior surfaces. After the self-cleaning cycle, allow the oven to cool before wiping away ash with a damp cloth. This routine ensures optimal performance and extends the lifespan of your appliance.
Avoiding Harsh Chemicals and Abrasives
Avoid using harsh chemicals or abrasive cleaners, as they can damage the oven’s interior, door gasket, or finish. These products may cause discoloration or weaken seals, reducing efficiency. Instead, clean exterior surfaces with mild detergents and hot water. After the self-cleaning cycle, use a damp cloth to wipe away ash residue. Never apply oven cleaners inside a self-cleaning oven, as they can harm the special coatings. Proper care ensures the oven remains in optimal condition and maintains its performance and appearance over time.
Checking and Replacing Oven Lights
Regularly inspect the oven lights for proper function and cleanliness. If a light burns out, refer to your Viking manual for replacement instructions. Turn off power to the oven before attempting any repairs. Remove glass covers and replace bulbs with Viking-approved replacements to ensure safety and compatibility; Clean glass surfaces with mild soap and water to maintain visibility. Avoid harsh chemicals, as they may damage the glass or seals. Properly functioning oven lights are essential for monitoring cooking progress and ensuring a safe, efficient cooking experience. Always follow Viking’s guidelines for replacements to maintain warranty coverage and performance.
Troubleshooting Common Issues
Address issues like error codes, excessive smoke, or a non-starting self-clean cycle by consulting your Viking manual for diagnostic guides and solutions to ensure optimal performance.
When the Self-Clean Cycle Won’t Start
If the self-clean cycle fails to initiate, ensure the oven door is fully closed and latched. Check for error codes and consult the manual for diagnostics. Verify all racks and utensils are removed, as they may obstruct the door or sensors. Ensure the self-clean mode is properly selected and the duration set correctly. If issues persist, reset the oven by unplugging it for 30 seconds or contact Viking support for assistance. Always refer to the troubleshooting guide in your owner’s manual for specific solutions to resolve the issue effectively.
Dealing with Excessive Smoke
Excessive smoke during the self-cleaning cycle often results from large food particles not fully burned off. To minimize smoke, ensure the oven is free from heavy debris before starting. Open nearby windows and turn on your kitchen exhaust fan to improve ventilation. Avoid interrupting the cycle, as this can prolong cleaning time and worsen smoke. If smoke persists, consider reducing the cycle duration or cleaning more frequently to prevent buildup. Always follow the manufacturer’s guidelines and safety precautions to manage smoke effectively and ensure a safe cleaning process.
Resolving Error Codes
If your Viking oven displays an error code during the self-cleaning cycle, refer to the user manual to identify the specific issue. Common codes like “E1” or “E2” often indicate temperature or sensor malfunctions. Power cycling the oven by disconnecting it from the power source for 30 seconds can sometimes resolve the issue. If the error persists, contact Viking customer support for assistance. Ensure you provide the exact error code and a detailed description of the problem for quicker troubleshooting. Regular maintenance, such as checking sensor accuracy, can help prevent future errors and ensure smooth operation of your Viking oven.
Warranty and Support
Viking ovens are backed by a comprehensive warranty, including a 1-year coverage for parts and labor. Extended warranties cover specific components up to 5-10 years. Contact Viking support for service requests and register your appliance for warranty validation.
Understanding the Viking Warranty
Viking’s warranty offers extensive coverage for its self-cleaning ovens, ensuring durability and performance. The standard warranty includes a 1-year period for all parts and labor, commencing from the purchase date. Additionally, key components like burners, bake elements, and porcelain surfaces are covered for up to 5-10 years, depending on the specific part. This comprehensive coverage provides peace of mind, knowing that repairs or replacements are handled efficiently. Proper registration and maintenance are essential to uphold warranty terms, ensuring continued protection for your investment in Viking’s high-quality appliances.
Contacting Viking Customer Service
For assistance with your Viking self-cleaning oven, contact their customer service at 1-888-VIKING1 (845-4641) or visit their official website. Authorized service agents are also available to address technical issues. Ensure you provide your oven’s model and serial number for efficient support. Remember to keep your purchase documentation handy for warranty-related inquiries. Viking’s customer service team is committed to resolving concerns promptly, ensuring your appliance performs optimally.
Registering Your Viking Oven
Registering your Viking oven ensures warranty validation and allows Viking to contact you with safety updates. Complete the Owner Registration Card and return it to Viking Range Corporation. Alternatively, register online through their official website for a streamlined process. Provide details like model number, serial number, and purchase date. This step is crucial for maintaining warranty coverage and receiving timely support. Keep your proof of purchase and registration confirmation for future reference, ensuring all benefits of ownership are fully accessible. Registration helps Viking assist you more effectively in case of any inquiries or service needs.
Viking self-cleaning ovens offer a convenient and efficient cleaning solution. By following the guidelines, you ensure optimal performance and longevity of your appliance, making maintenance effortless.
Final Tips for Effective Self-Cleaning
- Always remove racks and utensils before starting the cycle to prevent damage and ensure even cleaning.
- Wipe large spills beforehand to avoid excessive smoke and flare-ups during high heat operation.
- Keep the oven door closed throughout the cycle to maintain consistent temperatures and safety.
- After cooling, remove ash with a damp cloth and avoid harsh chemicals to preserve the oven’s finish.
- Regularly clean the door gasket to maintain a tight seal and optimal performance.
These steps ensure a safe, efficient, and long-lasting self-cleaning experience for your Viking oven.
Ensuring Long-Term Oven Performance
Regular maintenance is key to preserving your Viking oven’s efficiency and longevity. After each self-cleaning cycle, thoroughly wipe down the interior to remove ash and residue. Avoid using abrasive cleaners or harsh chemicals, as they can damage the finish. Check and replace oven lights as needed for clear visibility. Inspect the door gasket annually and replace it if worn to maintain proper sealing. Additionally, clean the exterior regularly to prevent grease buildup. By following these practices, you ensure optimal performance and extend the lifespan of your Viking oven.